
If anything, it gives a picture of all the time, steps and processes involved in making an everyday object that most of us depend on to wake up or get through the day once it's filled with hot caffeinated liquid.
Day 1: Throwing
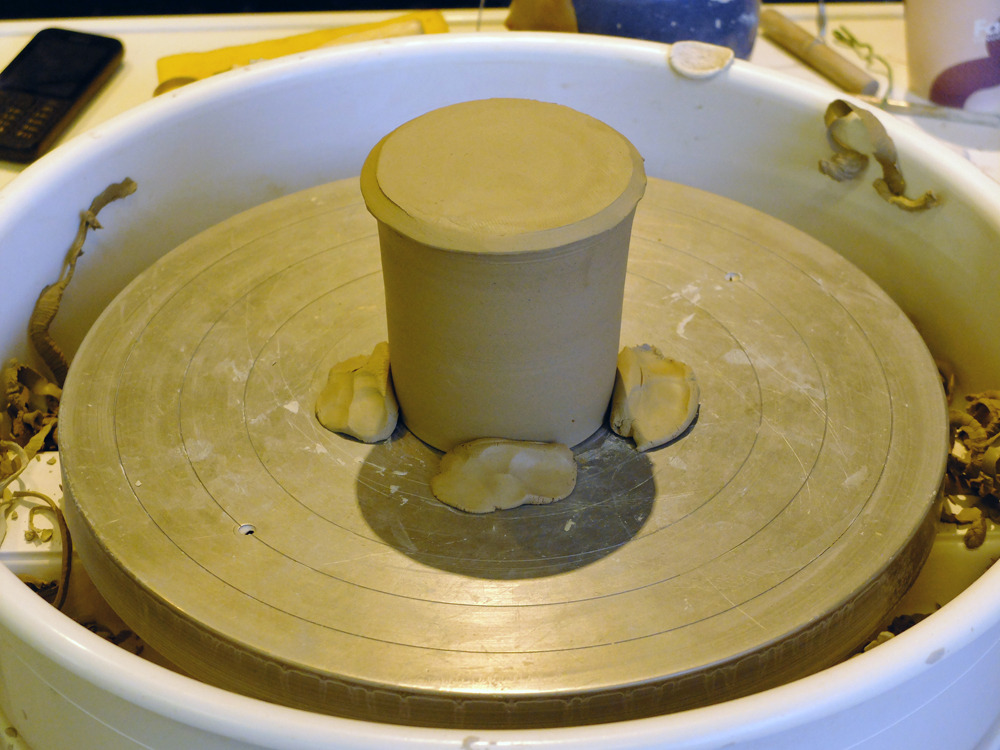
 The first step to any pottery is throwing. This is where you turn a lump of clay into a vessel, be it a cylinder, bowl, vase or bottle. Here are two cylinders I threw to make into mugs. The clay shrinks a lot so you have to make them much bigger than you want them at this stage. I tend to leave a decent amount of excess clay at the base so it's easier to lift off the wheel and the shape doesn't get distorted.
Day 2: Turning
All that excess clay needs to go and the bottom needs to be tidied up. This is done by turning/trimming the pot upside down. Using a sharp tool, you trim away the clay while the wheel is spinning. I was taught that it should be spinning at top speed so you are maintaining the profile. But this is dangerous as your pot could go flying. It happened to two of these but it's just one of life's hazards when you are potter (we'll cover more as the days go by).
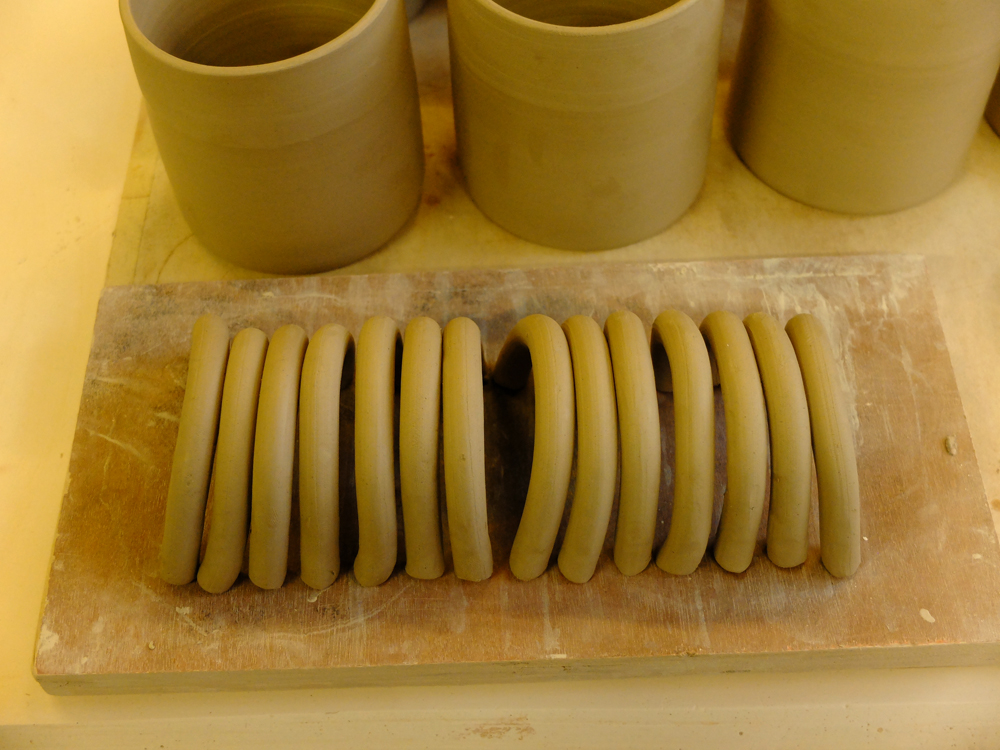
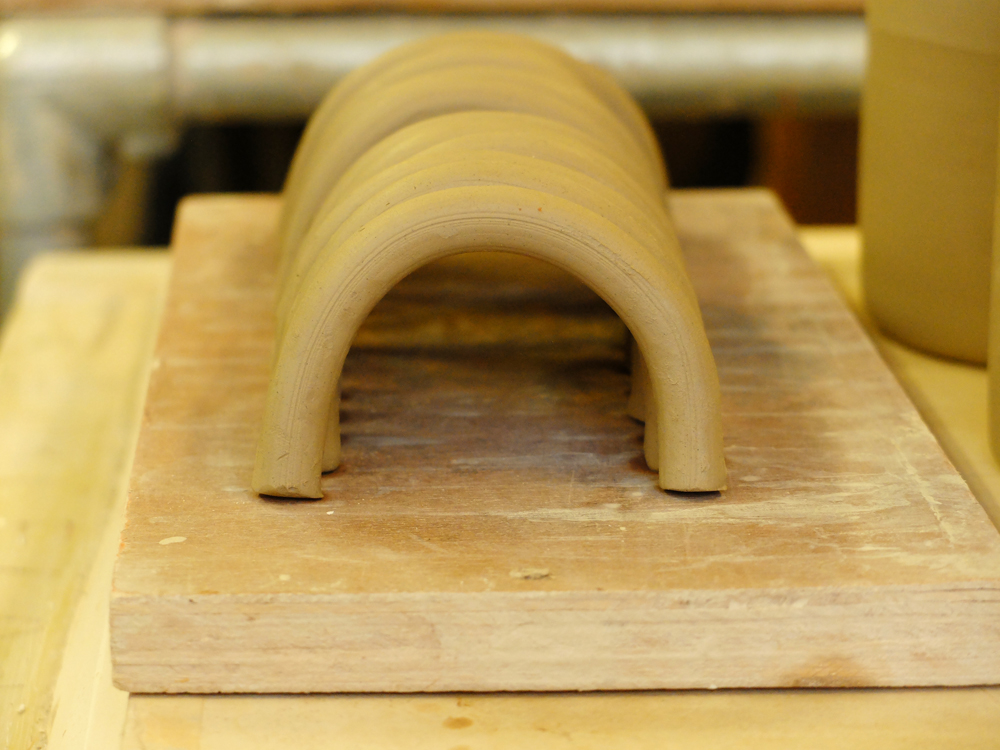
This can be done on the same day as turning if your pot and handle both have the same moisture content. The handles I've made for these mugs are extruded. An extruder works just like that Play-doh hair cut toy but the holes are at the bottom. It's kind of fun to use and makes really consistent handles but just like the toy version, it's no fun to clean up.
 To attach the handles - or a spout or anything else - you need to score both pieces and attach them using slip. Slip is made by adding water to dried powdered clay. It is somewhere between a liquid and a solid and it is basically glue made of clay. Then you have to smooth is all out so there are not cracks or air holes and generally so you don't have a messy join on an otherwise smooth mug. Sometimes with all the care in the world, the handles still crack off if they dry the wrong way (another hazard).
Day 4: Drying
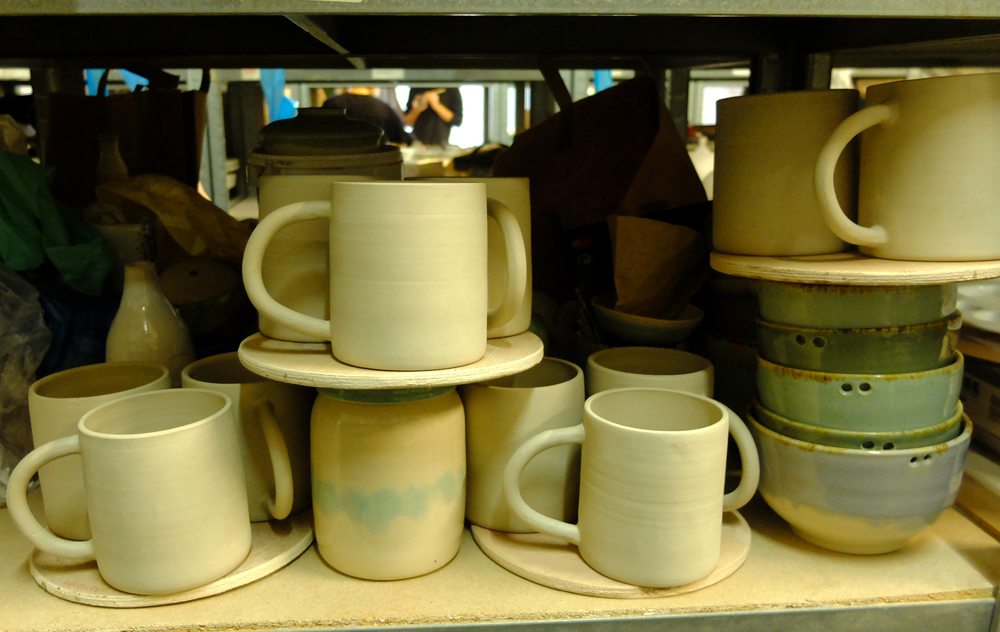
You cannot fire a pot if there is even a drop of moisture still in it. If you do, it could explode in the kiln. This would suck for you but it could also destroy other people's work and in a community studio, that's kind of frowned upon (and another hazard). So here they are with the handles attached taking up nearly all of my meagre shelf space with other pots helping me stack them up vertically.
Day 5: Glazing
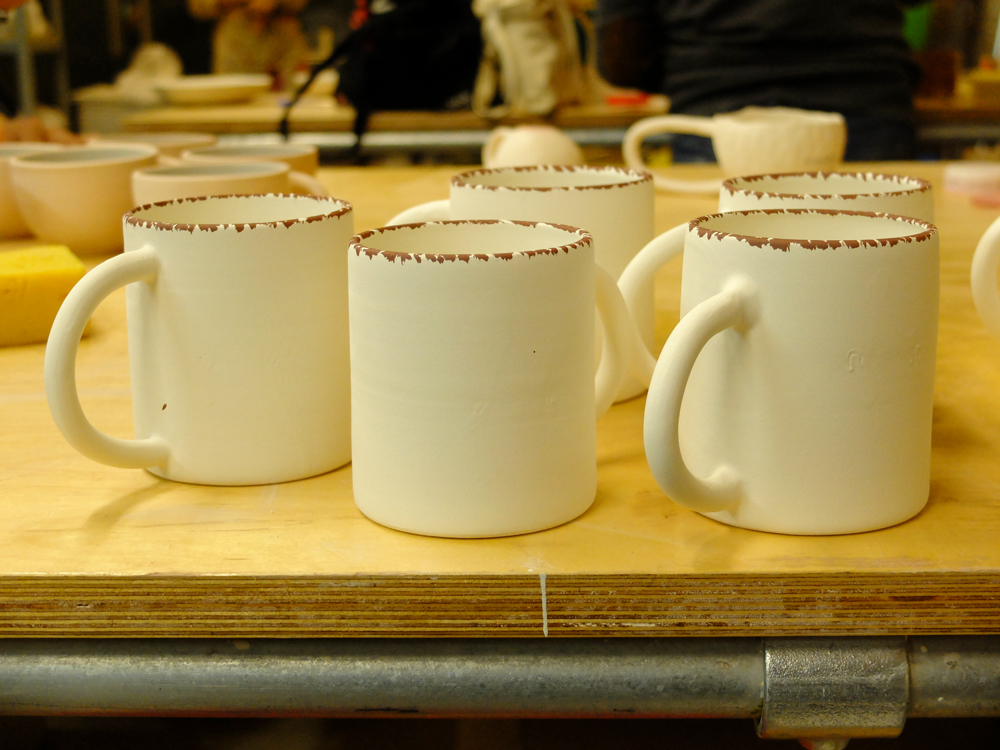
Once the mug has been through the first firing, it's known as bisque or biscuit fired. They both make it sound appetizing but it's just dry, hard porous clay. For things like plant pots, you might want to stop at this stage because porosity is good for plants. But this little mug isn't stopping here.
The first stage involves glazing it all over with transparent. Then the base needs to be cleaned off or else the pot will stick to the kiln shelf (hazard alert). At this stage I also brush a layer of iron oxide all around the rim. The aim is for this to melt into the glaze and run down both the inside and outside of the mug.
The first stage involves glazing it all over with transparent. Then the base needs to be cleaned off or else the pot will stick to the kiln shelf (hazard alert). At this stage I also brush a layer of iron oxide all around the rim. The aim is for this to melt into the glaze and run down both the inside and outside of the mug.
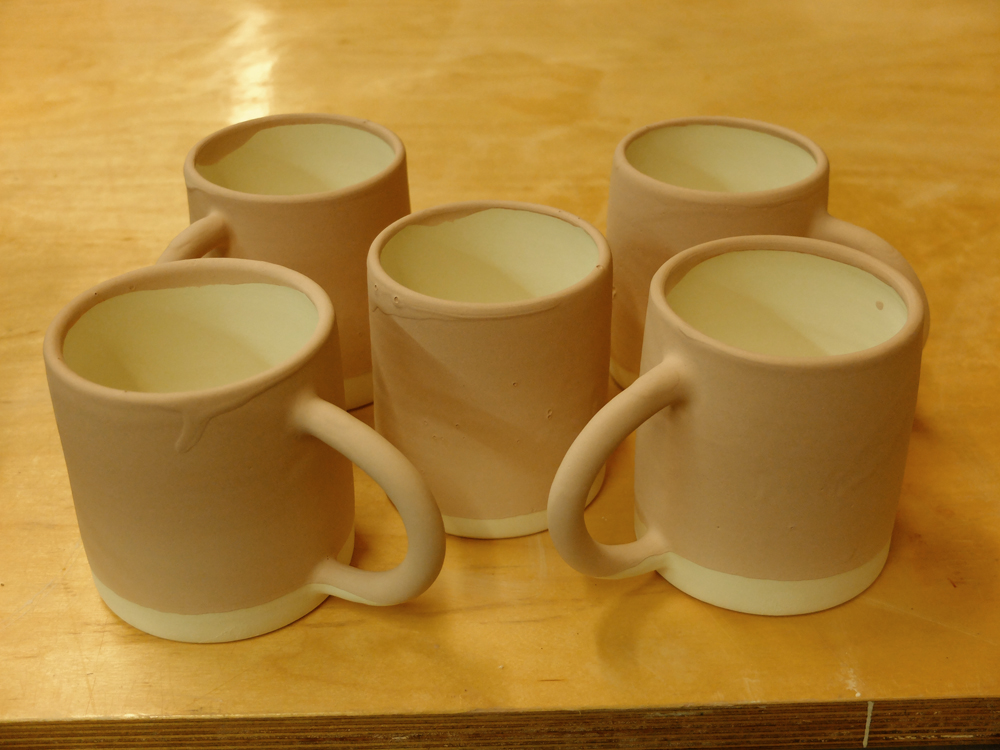
After that's all dry, it is then dipped into a second glaze of my own secret mix. It is only dipped to halfway down the bottom of the handle. This means you will get a little band of white clay (with transparent glaze) right at the base. Because of the minerals glaze is made with, the raw colour has absolutely nothing to do with how it will look once it's fired. These are a dull pink now but they will be a glossy pale green when they emerge.
Even if you've used the same glaze 400 times, there is still no guarantee it will come out the way you expect. Where it sits in the kiln can affect it. What it's sitting next to can affect it. Even dust that collected on it while it was waiting to go into the kiln can affect it (yet another hazard).
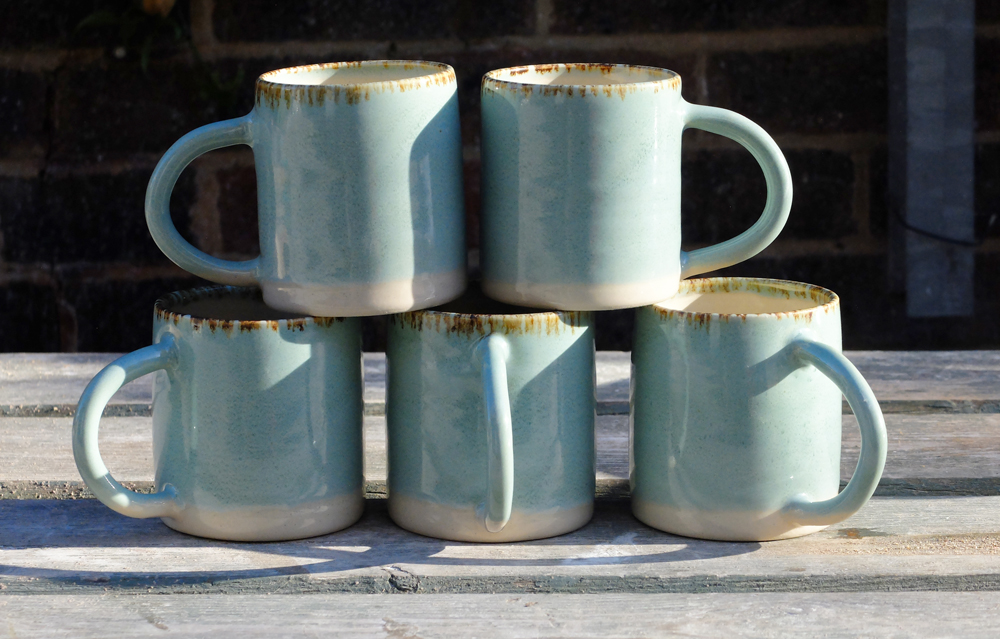
Once the kiln reaches 1235º C, the glaze will mature. This takes a long time. Then it has to cool back down to 40º C before you can even open the kiln. This also takes a long time. Is it clear yet how long it takes to make a mug? Don't worry, I'll say it again before the end of this post. Here you can see that the oxide behaved, running down and melting like I wanted it to. Sometimes things do work out.

So, many days of work go into making a mug by hand. Most commercially produced mugs are cast and no hand ever touches clay. The rest of the steps are probably done by a machine as well. So please think about how much thought, skill and labour go into hand made pottery and don't just think, 'but I could get mugs from Ikea for £1 each'. And if you do think that, please don't tell any potter. It's too upsetting.
We definitely understand that not everyone can afford hand made pots (most of us can't either) but that's not the same thing as assuming they should be as cheap as mass produced stuff. Fortunately for me, a nice woman commissioned me to make these mugs for her so I never have to convince anyone what I think they are worth.
No comments:
Post a Comment